History
Swift is a modern, safe, and highly performant programming language, scalable from “hello, world” to an entire operating system. It is the first industrial-quality systems programming language that is as expressive and enjoyable as a scripting language. Swift’s safety is an important aspect of the language, with a focus on finding and resolving errors at compile-time, instead of runtime. However, unlike most modern programming languages, Swift does not sacrifice speed for safety, and is on par with C and C++ performance. To understand how Swift has achieved this feat, we must understand the origins of the language.
Apple introduced Swift at its World Wide Developer Conference in 2014 as a modern replacement for the C-based languages (C, C++, Objective-C) that have been used for decades to build Apple products. Because Apple’s profits come from selling hardware, they need the performance of C-based languages to provide a better experience, but still spend less on CPUs and RAM than their competitors. This has been a key factor for Apple’s success and popularity, going back to the vastly superior user experience on the original Macintosh, vs the IBM PC. Despite the fact that the PC’s Intel processor was superior to the Mac’s 8-bit Motorola processor, MacOS was much more performant than Windows, which led to its success.
In the late 80’s the CEO of Apple, Steve Jobs, left the company to found NeXT Computer, Inc. While the company’s business model did not prove to be sustainable, it developed and pioneered several technologies ahead of its time. Chief among these was NextStep, the first commercial object-oriented, multitasking operating system based on UNIX. The Foundation and AppKit frameworks allowed anyone to easily build highly performant and complex graphical user interface applications with relative ease. These novel features at the time attracted interest from computer scientists and researchers. The operating system gained notoriety for being the platform on which Tim Berners-Lee created the first web browser, as well as being the development platform for pioneering PC games such as Wolfenstein 3D, Doom, Doom II, and Quake. All these achievements were made possible by the Objective-C programming language which powered NextStep, from which OS X and iOS are derived.
Objective-C was created primarily by Brad Cox and Tom Love in the early 1980s at their company Stepstone. It is a strict superset of C, with Object Oriented Programming features. Java, one of the most widely used programming languages for building servers, was heavily influenced by Objective-C, especially with the concept of protocols, which are similar to Java’s interfaces. Unlike Java, Objective-C is compiled to assembly code, lacks a virtual machine, and uses a referenced counting memory model, instead of garbage collection. Compiling Ahead-of-Time to the target CPU’s assembly code makes it faster than interpreted languages like JavaScript or PHP, or Just-in-Time compiled languages like Java and C#. Reference Counting provides a deterministic memory model which does not require cleanup later, unlike garbage collection. Objective-C’s object oriented programming model, coupled with C’s performance, allow for relatively high performance and low memory footprint applications. Unfortunately, it suffers from the lack of type safety that C has. Despite this, Objective-C has served Apple well for over 30 years and still powers their iOS and OS X operating systems and SDKs.
Originally, GCC (GNU Compiler Collection) was the only widely used and supported compiler that could compile C based languages, including Objective-C. In 2005, Apple hired Chris Lattner to work on his LLVM (Low Level Virtual Machine) compiler project, as an eventual replacement for GCC. As Lattner was working on his Objective-C compiler, he introduced new features to the language, chiefly, ARC (Automatic Reference Counting), blocks, subscripting, and literals. Wanting to improve the language even further, and feeling constrained by the limitations of C, Lattner took these concepts and started to develop a new programming language in 2010, Swift.
Because Swift was developed by a team of compiler hackers, they were able to create a modern and safe language, while keeping a high performance and Application Binary Interface compatibility with C. Since LLVM compiles both Swift and C, Swift can effortlessly call C functions, and manipulate C types. In fact, any struct you can build in C, can be defined in Swift, with LLVM exporting the same memory layout and alignment as its C counterpart.
Getting started
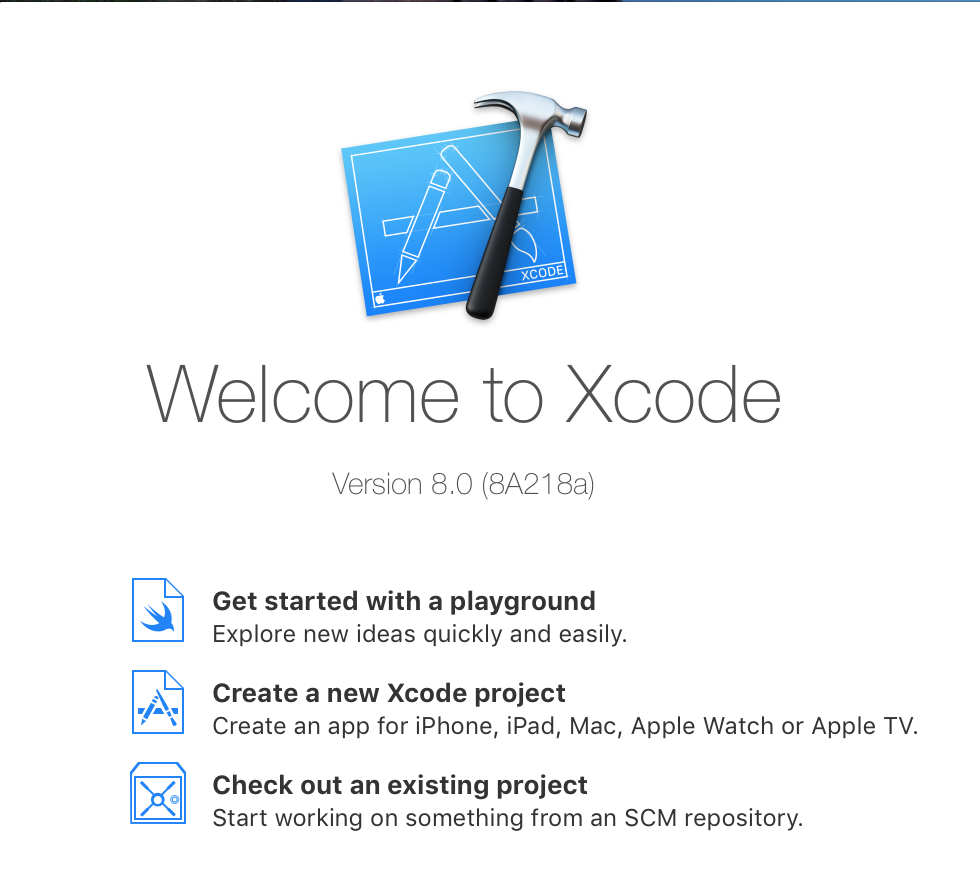
Lets get started writing some Swift code. The easiest way to get started is to open the Swift REPL, which interactively compiles Swift as if it were a scripting language. If you have a Mac with Xcode 8 installed, you can get started by creating a new playground.
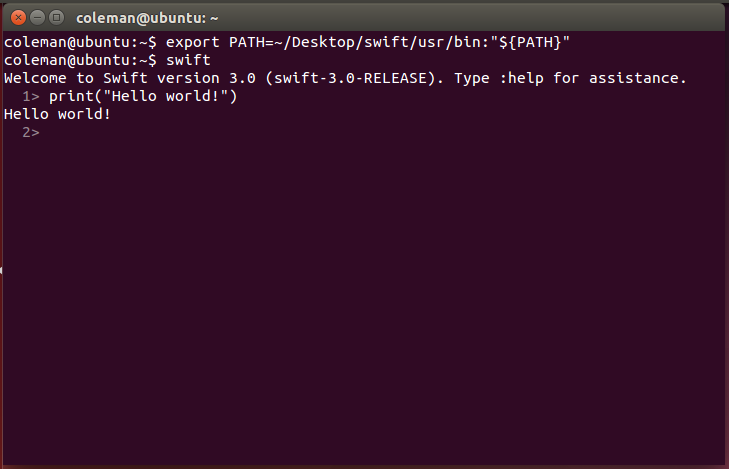
If you have Linux, you can download Swift at swift.org. Deployment of Swift to Linux servers will be discussed in chapter 3. If you already have it installed, simply type swift in the command line and the interactive REPL will start processing your code.
IBM offers a free online Swift compiler, which can also be used for compiling Swift code that only depends on the libraries bundled with the language (more on that in chapter 3), you can find it at swiftlang.ng.bluemix.net.

Language Features
Values
let and var are used to declare constants and variables, respectively. Values in Swift are never null by default, and are always initialized before use. The type of a value can be implicitly inferred by the compiler, or explicitly declared by the developer.
let constant = 10
var variable = 20
variable = 25
let implicitValue = 100
let explicitValue: Int = 100
Strings can be defined as literals, or programmatically created and concatenated.
let staticString = "I love this string"
let dynamicString = String(1) + "\(2 + 2)" // prints 14
Create arrays and dictionaries using brackets ([]) or its generic counterparts. You can also use subscripting to access elements by its key or index.
let emptyArray = [Int]()
let arrayLiteral = [1, 2, 3]
let arrayGeneric = Array<Int>(arrayLiteral: 1, 2, 3)
print(arrayLiteral[0]) // prints 1

let emptyDictionary = [String: String]()
let dictionaryLiteral = ["key": "value"]
let dictionaryGeneric = Dictionary(dictionaryLiteral: ("key", "value"))
print(dictionaryLiteral["key"]) // prints Optional("value")
print(dictionaryLiteral["invalidKey"]) // prints nil
Values in Swift are never nil by default, trying to use nil values results in a compile-time error. This prevents huge categories of bugs related to nil pointers, and makes your code cleaner and safer. However, when a value needs to be represented as nil, an optional is used. Optionals are type-safe wrappers for nil values that you can safely access using ?.
let value: String = "Hello world"
var optionalValue: String? = nil
// var optionalValue: String = nil // will not compile
optionalValue = value
print(optionalValue) // prints Optional("Hello world")
Control Flow
Use if and switch to make conditionals. Unlike in C, break is implicit in each case in a switch statement.
let value = 10
if value > 1 {
    print("\(value) is larger than 1")
} else {
    print("\(value) is smaller than or equal to 1")
}
switch value {
case 10:
    print("Value matches 10")
case 1:
    print("Value matches 1")
    break
default:
    print("\(value) is not 10 nor 1")
}
switch statements can evaluate any type that can be tested for equality, not just numbers.
let species = "Human"
switch species {
    case "Dog": print("Woof woof")
    case "Klingon": print("qavan jup")
    case "Human": print("Hello friend")
    default: break // do nothing
}
You can use if and let to safely check an optional’s value.
var optionalValue: String? = "I may be nil"
if let value: String = optionalValue {
    print(value)
}
Another way to handle optional values is to use the null coalescing operator (??). This operator will attempt to safely unwrap the optional value, and provide a default value if the optional is nil.
var clientName: String? = nil
print("Hello \(clientName ?? "customer")") // prints "Hello customer"
clientName = "John"
print("Hello \(clientName ?? "customer")") // prints "Hello John"
Use for-in, while, and repeat-while to make loops.
let array = ["value1", "value2", "value3"]

// `for-in` loop
for value in array {
    print(value)
}

// `while` loop
var i = 0
while i < array.count {
    print(array[i])
    i += 1
}

// `repeat-while` loop
i = 0 // reset counter
repeat {
    print(array[i])
    i += 1
} while i < array.count
Functions, Tuples and Closures
Functions are declared with func. Although the returned value type is Void by default, you can specify it with ->.
func log(_ string: String) -> Void {
    print("Log: " + string)
}
func errorLog(_ string: String) {
    print("Error: " + string)
}
func sum(_ value1: Int, _ value2: Int) -> Int {
    return value1 + value2
}

let result = sum(1, 2)
if result == 3 {
    log("Result is \(result)")
} else {
    errorLog("An error occurred")
}
Functions use their parameter (or argument) names as labels. You can write a custom argument label in addition to the parameter name, or use _ to omit the argument label.
func temperature(_ temperature: Double, for person: String) {
    print("Hey \(person), the temperature is \(temperature) degrees Celcius.")
}
temperature(30, for: "John")
A function can return multiple values using a tuple. It’s elements can later be accessed by name or index. A tuple is also known as a static array in C, or anonymous structure in other languages.
func parse(_ versionString: String) -> (major: Int, minor: Int, patch: Int) {
    switch versionString {
        case "1.2.0": return (1, 2, 0)
        default: return (0, 0, 0)
    }
}
let version = parse("1.2.0")
print("Major version is \(version.major)")
print("Minor is \(version.1)")
A closure defines a block of code in similar fashion as a function and is also known as a block, lambda, or anonymous function. Closures are declared with braces ({}) and in is used to separate the arguments from its body. Functions and closures can be used interchangeably.
func descriptionMap(number: Int) -> String {
    return "My value is \(number)"
}

let numbers = [1, 2, 3, 4, 5]

let numberDescriptions1 = numbers.map(descriptionMap)
print("Passing function as closure:\n", numberDescriptions1)

let numberDescriptions2 = numbers.map({ (number) in descriptionMap(number: number) })
print("Calling function from closure with parameter name:\n", numberDescriptions2)

let numberDescriptions3 = numbers.map({ descriptionMap(number: $0) })
print("Calling function from closure with parameter number:\n", numberDescriptions3)

let closure: (_ number: Int) -> String = { "My value is \($0)" }
let numberDescriptions4 = numbers.map(closure)
print("Passing closure as parameter:\n", numberDescriptions4)

let numberDescriptions5 = numbers.map { "My value is \($0)" }
print("Declaring closure in parameter:\n", numberDescriptions5)
A big difference between functions and closures is that closures have access to variables and functions in the scope it was declared in, while functions need values passed as parameters from another scope.
var parameter = 5
func printAgeFunction(_ age: Int) {
    print("You are \(age) years old")
}
var printAgeClosure: () -> () = {
    print("You are \(parameter) years old")
}
printAgeFunction(parameter)
printAgeClosure()
Classes and Objects
A class is declared with class followed by the class name. Methods and properties are declared the same as functions and variables, but are located inside the scope of a class. Methods can access other methods or properties of the class, without explicitly specifying the self keyword.
/// `Person` class declaration
class Person {
    /// Constant property
    let name: String
    /// Variable property
    var age: Int
    /// Object initializer
    init(name: String, age: Int) {
        self.name = name
        self.age = age
    }
    /// Computed property
    var description: String {
        // access properties with explicit and implicit `self`
        return "Hello! My name is \(self.name) and I am \(age) years old."
    }
    /// Method
    func printDescription() {
        print(description)
    }
}

let person = Person(name: "John", age: 21) // instantiate an instance (or object) of the class.
person.age += 1 // increment by one
person.printDescription() // prints "Hello! My name is John and I am 22 years old."
Use deinit to define a deinitializer for the class to perform cleanup before the object is deallocated.
class Item {
    var name: String?
    init(name: String?) {
        self.name = name
    }
    deinit {
        // free up name string
        self.name = nil
    }
}
Subclasses can extend the functionality of its parent class and override the implementation of methods declared in the parent class using the override keyword. The parent class implementation of a method can be called with super.
class User {
    let name: String
    init(name: String) {
        self.name = name
    }
    func printName() {
        print("My username is", name)
    }
}

class SuperUser: User {
    init() {
        super.init(name: "SuperUser")
    }
    override func printName() {
		    super.printName()
        print("I am root")
    }
}

let user = User(name: "John")
user.printName()
let root = SuperUser()
root.printName()
Enumerations and Structures
Use enum to declare an enumeration. All types in Swift can have properties and methods associated with them, including enumerations and structures. Properties in an enumeration must be computed and cannot be stored.
enum Car {
    case suv
    case truck
    case convertible
    case van
    var description: String {
        switch self {
        case .suv: return "Sports Utility Vehicle"
        case .truck: return "Truck"
        case .convertible: return "Convertible"
        case .van: return "Van"
        }
    }
}

print(Car.suv.description)
An enumeration can represent an underlying value, or have associated values. The underlying value (or raw value) is declared as a constant in each case. An enumeration’s associated value type is declared in each case within enclosing parenthesis. Enums with raw integer values are compiled like enumerations in C and can be used interchangeably, while enums with associated values are compiled like C unions, and can also be used interchangeably. Optionals in Swift are really just a case of a generic enum with compiler optimizations.
/// Example implementation of optionals in Swift
enum OperationType: Int {
    case DELETE = 1
    case UPDATE
}

let operation = OperationType.UPDATE
print("Underlying value of \(operation) is \(operation.rawValue)")

enum Number {
    case boolean(Bool)
    case integer(Int)
    case double(Double)
    var description: String {
        switch self {
        case let .boolean(value): return "Boolean: \(value)"
        case let .integer(value): return "Integer: \(value)"
        case let .double(value): return "Double: \(value)"
        }
    }
}

let number = Number.integer(5)
print(number.description)

/// Example implementation of optionals in Swift
enum OptionalNumber {
    case some(Number)
    case none
    var description: String {
        switch self {
        case let .some(value): return "Optional(\(value))"
        case .none: return "nil"
        }
    }
}

let customOptionalNumber: OptionalNumber = .none
let swiftOptionalNumber: Optional<Number> = Swift.Optional.none
let swiftOptionalNumber2: Number? = nil // shorthand syntax for previous statement
print(customOptionalNumber.description)
print(swiftOptionalNumber)
print(swiftOptionalNumber2)
Structures in Swift are identical to structures in C, but can additionally implement methods like all types in Swift. Unlike classes, structures (and enumerations) are value types. This means that when a structure is passed to another variable or scope, a copy is made on the stack. On the other hand, reference types (objects) keep their data on the heap. This is important for dealing with performance and bugs, because memory on the stack is faster to access and modify than on the heap, and is cleaned when exiting the current scope. Reference types have shared memory, while a value type is guaranteed to be a unique copy. The tradeoff for value types is that the size of values that will be stored on the stack must be known at compile-time. Another issue is that for non-trivial data (larger than a few bytes), it is expensive to make a copy every time the value type is passed to another variable or scope. Because of these tradeoffs, String, Array, Dictionary and other types that maintain data of variable length must allocate memory on the heap. Another key difference is that classes can be subclassed while a structure’s implementation is static. This makes calling a structure’s method as fast as calling a C function. Use struct to declare a structure.
struct PersonValueType {
    var name: String
    init(name: String) {
        self.name = name
    }
    func sayMyName(){
        print("My name is", name)
    }
}
class PersonReferenceType {
    var name: String
    init(name: String) {
        self.name = name
    }
    func sayMyName(){
        print("My name is", name)
    }
}

let name = "John"
let newName = "Mark"

let value = PersonValueType(name: name)
value.sayMyName() // prints "My name is John"
// value = PersonValueType(name: newName) // will not compile
// value.name = name // will not compile
var valueCopy = value
valueCopy.name = newName
print("Value:", value.name) // prints "Value: John"
print("Value Copy:", valueCopy.name) // prints "Value Copy: Mark"

let reference = PersonReferenceType(name: name)
reference.sayMyName() // prints "My name is John"
// reference = PersonReferenceType(name: newName) // will not compile
reference.name = name // reference type constants can be freely mutated
let referenceCopy = reference
referenceCopy.name = newName
print("Reference:", reference.name) // prints "Reference: Mark"
print("Reference Copy:", referenceCopy.name) // prints "Reference Copy: Mark"
As we can see from the previous example, PersonValueType and PersonReferenceType have the exact same implementation with the exception of their respective types: struct vs class. When a constant value type is created with let, the structure (or enumeration) is immutable. Trying to mutate an immutable value will result in a compile-time error. On the other hand, object instances declared with let can be freely mutated, as long at instance itself is not replaced in its entirety. This is because an object’s properties and memory are stored in the heap, while a structure is stored on the stack. To make a struct mutable, declare it as a variable with var. As we can see in the log, mutating a copy of the structure does not mutate the original value. On the contrary, mutating a copy of the object mutates the original, despite using the let keyword to declare a constant. For these reasons, the Swift Standard Library is mostly composed of structures and enumerations.
Protocols and Extensions
Use protocol to declare a protocol. All types in Swift can conform to a protocol, including other protocols.
protocol IntegerValue {
    // The integer value this type represents
    var value: Int { get }
}

protocol Incrementable: IntegerValue {
    // Increments the value by one.
    mutating func increment()
}

struct NumberStruct: Incrementable {
    var value = 0
    mutating func increment() {
        value += 1
    }
}

var numberStruct = NumberStruct()
numberStruct.increment()
print("Struct:", numberStruct.value)

class NumberClass: Incrementable {
    var value = 0
    func increment() {
        value += 1
    }
}

let numberClass = NumberClass()
numberClass.increment()
print("Class:", numberClass.value)

enum NumberEnum: Incrementable {
    case integer(Int)
    case double(Double)
    var value: Int {
        switch self {
        case let .integer(value): return value
        case let .double(value): return Int(value)
        }
    }
    mutating func increment() {
        switch self {
        case let .integer(value): self = .integer(value + 1)
        case let .double(value): self = .double(value + 1)
        }
    }
}

var numberEnum = NumberEnum.integer(0)
numberEnum.increment()
print("Enum:", numberEnum.value)
A protocol can also require associated types as part of its constraints.
protocol IntegerRepresentable {
    associatedtype IntegerType: Integer
    var integerValue: IntegerType { get }
}

struct ArrayCount: IntegerRepresentable {
    let integerValue: Int /// `IntegerType` is `Int`
    init(array: [Any]) {
        self.integerValue = array.count
    }
}

print(ArrayCount.IntegerType.self) // prints Int

struct KeyCount: IntegerRepresentable {
    let integerValue: UInt64 /// `IntegerType` is `UInt64`
    init(dictionary: [AnyHashable: Any]) {
        self.integerValue = UInt64(dictionary.keys.count)
    }
}

/*
// Error: type 'InvalidType' does not conform to protocol 'IntegerRepresentable'
struct InvalidType: IntegerRepresentable {
    let integerValue: Double
}
 */

print(KeyCount.IntegerType.self) // prints UInt64
Use extension to add more functionality to a type, such as computed properties, methods, and protocol conformance, after that type has been declared. You can even extend the functionality of types from other compiled modules, such as the Swift Standard Library. An extension can be added to any type in Swift.
protocol Addition {
    func add(_ other: Self) -> Self
}

/// Retroactively make `Int` conform to `Addition` protocol
/// and provide the required implementation.
extension Int: Addition {
    func add(_ other: Int) -> Int {
        return self + other
    }
}

print(2.add(2))

/// Declare an extension to an existing protocol.
extension Swift.IntegerArithmetic {
    func add(_ other: Self) -> Self {
        return self + other
    }
}

/// Since `Int64` conforms to `IntegerArithmetic`,
/// the type can conform to the `Addition` protocol without providing its own implemention of `add()`
/// because the previous protocol extension already fullfilled that requirement.
extension Int64: Addition { }

print(Int64(2).add(2))
Error Handling
The Swift standard library provides the Error protocol to declare any type that can be thrown. Use throw to throw an error and throws to mark a function as fallible. Throwing and catching errors in Swift are as performant as checking returned values with if-else, but with a much richer syntax and the ability to catch specific errors. Use do-catch to run a block of code that contains fallible code. Use the try keyword on every function, method, or block that can throw an error. For functions that can throw an error, but also turn a value, use try? to ignore the errors and instead return nil. Use try! to force a throwable function to return with no errors, and otherwise crash.
enum NetworkingError: Error {
    case noResponse
    case errorStatusCode(Int)
}

func fetch(data: [UInt8]?) throws -> [UInt8] {
    if let data = data {
        return data
    } else {
        throw NetworkingError.noResponse
    }
}

do { try fetch(data: nil) }
catch NetworkingError.errorStatusCode(404) { print("Resource not found") }
catch { print("An error occurred:", error) }


let optionalData: [UInt8]? = try? fetch(data: nil) // value will be nil
let forcedData: [UInt8] = try! fetch(data: [0x01, 0x02, 0x03])
// let forcedData: [UInt8] = try! fetch(data: nil) // will crash
Generics
A generic function or type is declared with angle brackets (<>). Structures, classes and enumerations can be generics. A protocol’s functions can be generic but the protocol itself cannot. Use where to specify requirements for the generic.
func extractHashes<T: Collection>(_ collection: T) -> [Int] where T.Iterator.Element: Hashable {

    return collection.map { $0.hashValue }
}

let hashes = extractHashes(["hello", "world"])

print("Hashes:", hashes)

enum ErrorValue<Value> {
    case error(Error)
    case value(Value)
}

struct CustomError: Error {
    let message = "An error ocurred"
}

func psuedoError<T>(_ value: T?) -> ErrorValue<T> {

    guard let value = value
        else { return .error(CustomError()) }

    return .value(value)
}

print(psuedoError("My string value"))
print(psuedoError(nil) as ErrorValue<Int>)